1. DIY CKLink
参考 & 固件来源(Reference):【平头哥Sipeed LicheeRV 86 Panel测评】自制CKLink-lite调试器,调试D1裸机编程 http://bbs.eeworld.com.cn/thread-1200313-1-1.html
如果你已经有了平头哥官方的 CKLink 工具,可以直接跳到 软件安装。
If you already have a CKLink tool from T-Head, you can jump to Software Prepare.
首先我们需要准备一个 stm32f103 开发板,然后下载 CKLink 固件,并烧录到 stm32f103 中:
A stm32f103 board is needed. Download the CKLink firmware and flash it into the board:
wget https://github.com/Judehahh/duo-buildroot-sdk/releases/download/Duo-debug/cklink_lite_mod.hex

# 使用你喜欢的方式来烧录
# Burn the firmware with the way you like
openocd -f interface/cmsis-dap.cfg -f target/stm32f1x.cfg -c init -c halt -c "flash write_image erase cklink_lite_mod.hex"
然后连接 stm32f103 和 Duo:
Then connect stm32f103 and Duo:
stm32-----Duo
==================
 PB9------JTAG_TDI
 PA4------JTAG_TDO
 PA5------JTAG_TMS
 PA1------JTAG_TCK
 GND------GND


2. 软件安装 / Software Prepare
然后下载平头哥的调试工具:
Download the T-Head-DebugServer:
wget https://occ-oss-prod.oss-cn-hangzhou.aliyuncs.com/resource//1698310757460/T-Head-DebugServer-linux-x86_64-V5.18.0-20230926.sh.tar.gz
tar xf T-Head-DebugServer-linux-x86_64-V5.18.0-20230926.sh.tar.gz
sudo ./T-Head-DebugServer-linux-x86_64-V5.18.0-20230926.sh -i
3. 替换 fip.bin / Replace fip.bin
替换前记得备份自己的 fip.bin 文件
Remember to backup your fip.bin before you replace it.
需要替换 sd 卡中的 fip.bin 文件,以开启 debug 的相关配置,修改后的 fip.bin 我发布在了 github 上: Duo-debug-release,具体的修改内容可参考以下链接:
Replace the fip.bin file in the sd card to enable debug function, the modified fip.bin has been posted on github: Duo-debug-release, the specific changes can be referred to the following link:
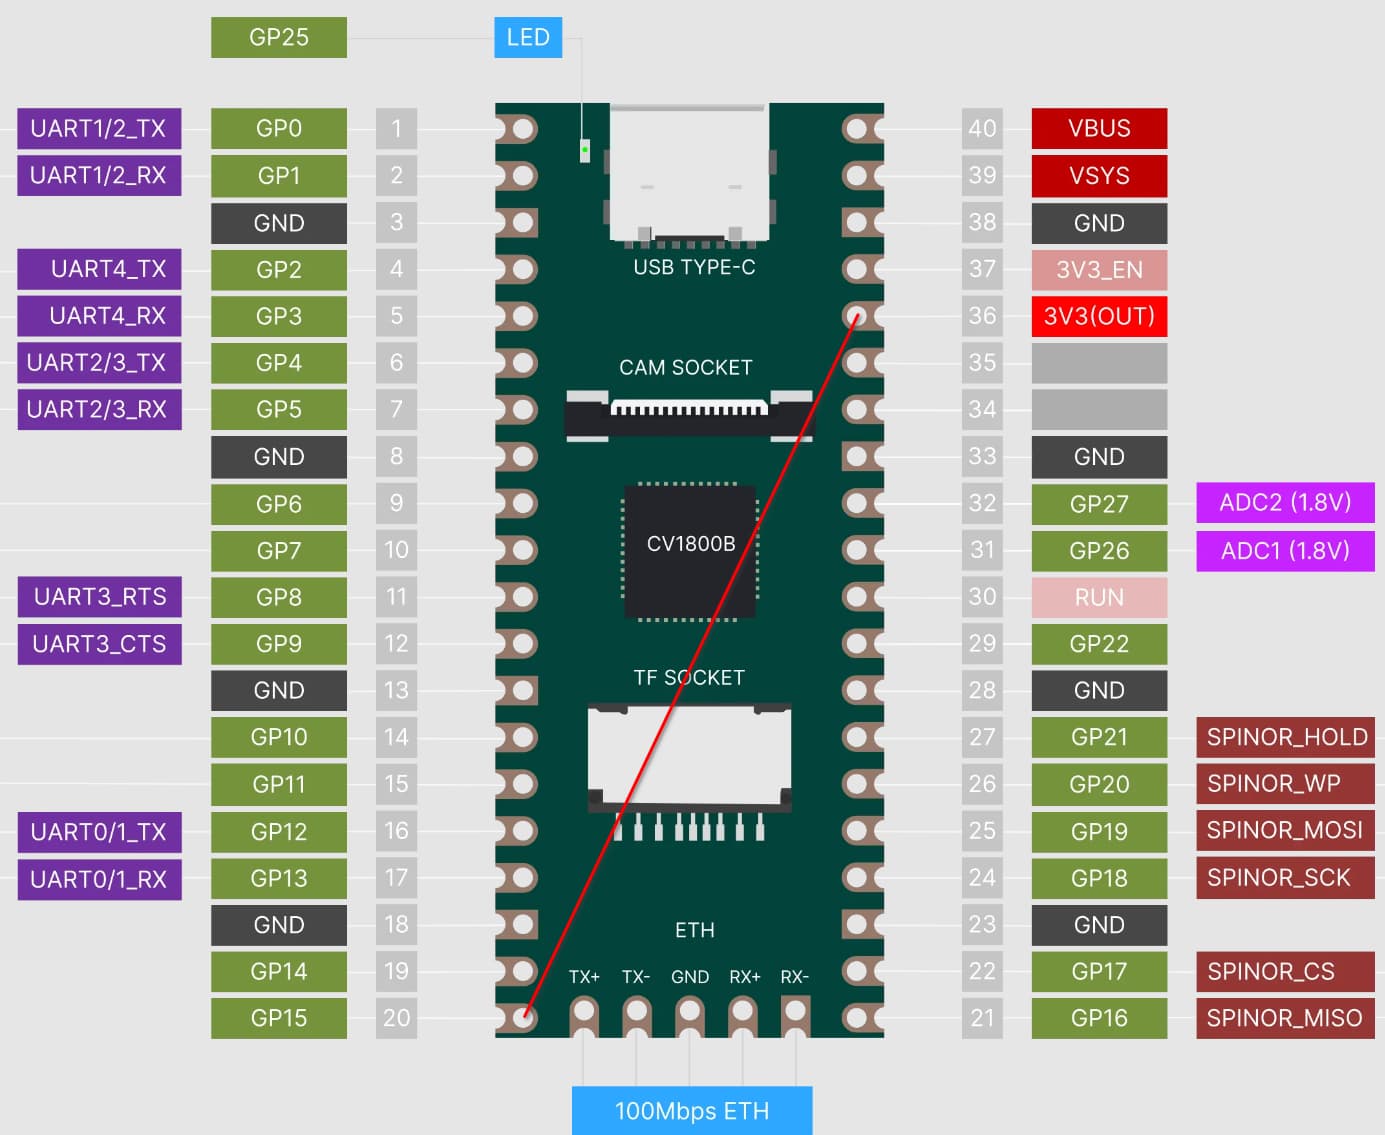
在替换了 fip.bin之后,使用杜邦线将 Duo 上的 GP15 端口与 3V3(OUT) 连接,在 bl2 中会通过判断该端口是否拉高来决定是否开始 Debug 模式。
After replacing the fip.bin, connect the GP15 port to 3V3(OUT), cause it is decided whether to start debug mode by judging whether the GP15 port is pulled up or not in bl2.
上电之后可以看到以下信息:
You can see this information after power on the Duo:
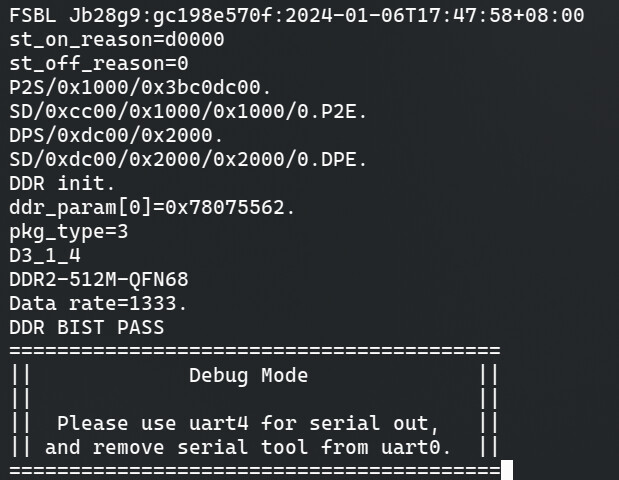
断开 GP15 与 3V3(OUT) 的连接之后就可以正常启动了。
To boot normally, just disconnect the GP15 port and 3V3(OUT).
4. Time To Debug
在做好准备工作之后就可以愉快地 Debug 了 :
Your can start to debug your Duo now:![]()
% DebugServerConsole
+---                                                    ---+
|  T-Head Debugger Server (Build: Sep 26 2023, Linux)      |
   User   Layer Version : 5.18.00
   Target Layer version : 2.0
|  Copyright (C) 2023 T-HEAD Semiconductor Co.,Ltd.        |
+---                                                    ---+
New firmware of CKLINK is detected, please enter 'y' to update or 'n' to ignore:
如果你使用 stm32,请按 n
Enter n if you use stm32.
看到以下信息说明连接上了:
The connection is successful if you see this:
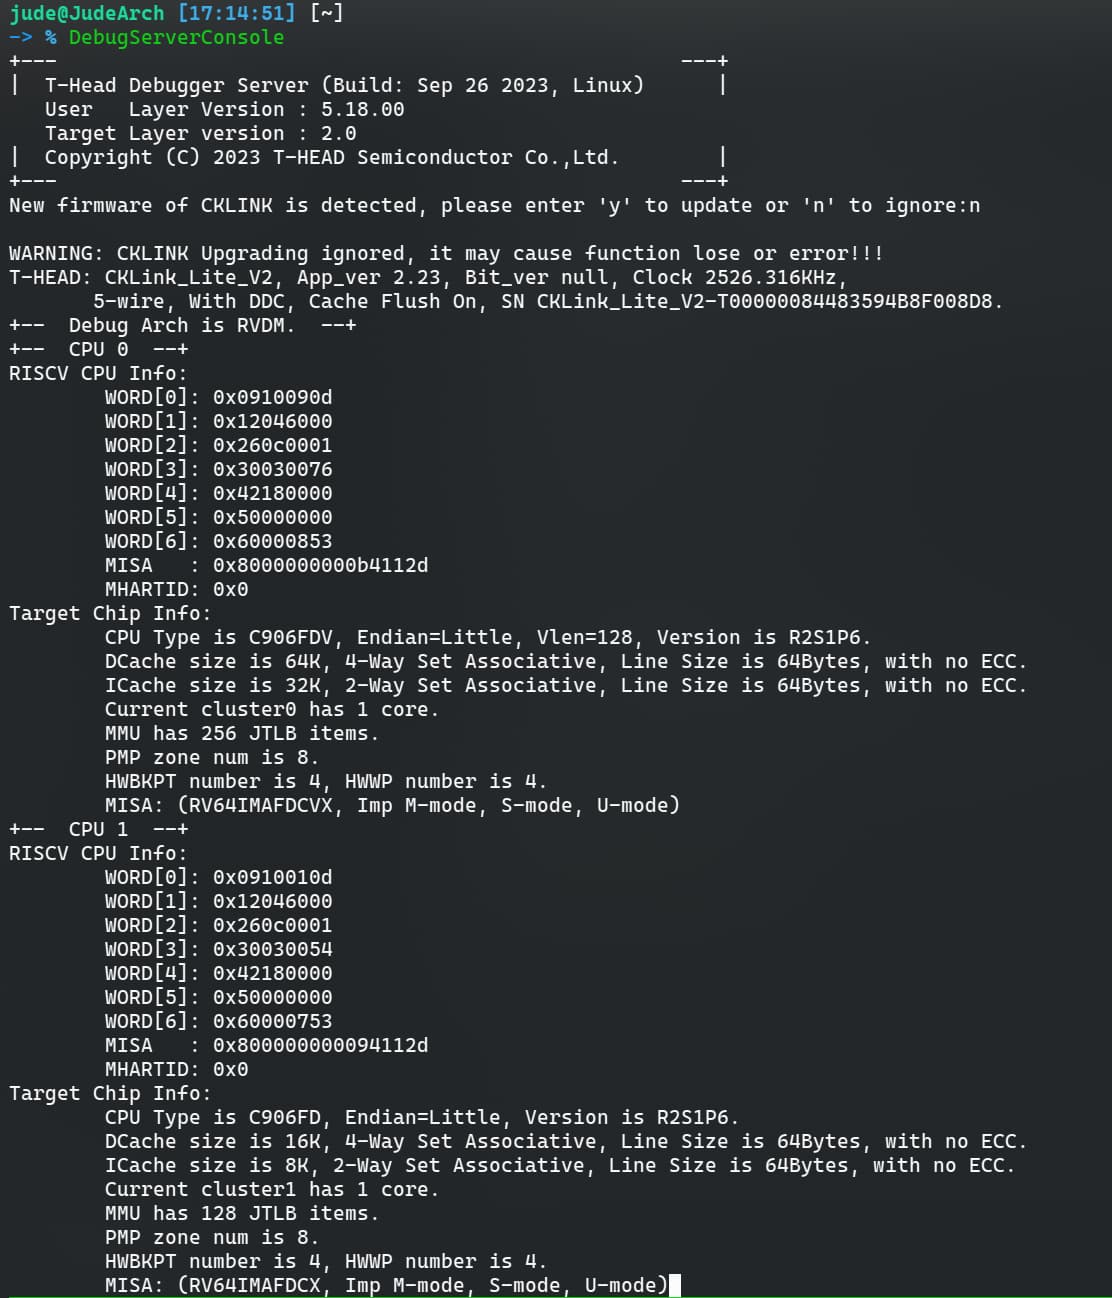
现在可以打开另一个窗口进行调试了:
And you can open a new terminal to debug now:
# Connect to the main core
riscv64-linux-gnu-gdb -ex "target remote :1025"

# Connect to the small core
riscv64-linux-gnu-gdb -ex "target remote :1026"
