下载 milkv-duo-archlinux-riscv64-2023-10-09-7.0gb-v0.0.3-spiritdude.zip 443 MB (465,544,964 字节)
- milkv-duo-archlinux-riscv64-2023-10-09-7.0gb-v0.0.3-spiritdude.zip - Google Drive
- 8GB SD card minimum
- random but persistent MAC addresses for RNDIS
- static board IP 192.168.42.1 (as before)
- enable NAT on your host, then your board(s) are able to reach the internet via RNDIS.
- 解压 milkv-duo-archlinux-riscv64-2023-10-09-7.0gb-v0.0.3-spiritdude.img 7.51 GB (8,074,035,200 字节)
- 把镜像刷到 tf 卡,需要 8G以上的卡;插入tf卡,引导系统
ssh [email protected]密码milkv使用 USB数据线 RNDIS
修改配置能访问公网的网络 vi /etc/usb-rndis.sh
- 增加网卡设备
end0的固定IP配置
ip link set dev end0 up
ip a add 192.168.1.193/24 dev end0
ip r add default via 192.168.1.1
- 参考如下 /etc/usb-rndis.sh 完整的配置,然后重启
#!/bin/sh

/etc/uhubon.sh device >> /tmp/rndis.log 2>&1
/etc/run_usb.sh probe rndis >> /tmp/rndis.log 2>&1
/etc/rndis-macs.sh >> /tmp/rndis.log 2>&1
/etc/run_usb.sh start rndis >> /tmp/rndis.log 2>&1

sleep 0.5
ip link set dev usb0 up
ip a add 192.168.42.1/24 dev usb0
sleep 0.5
systemctl start dnsmasq
sleep 2

ip link set dev end0 up
sleep 0.5
ip a add 192.168.1.193/24 dev end0
sleep 0.5
ip r add default via 192.168.1.1
sleep 2

#ifconfig usb0 192.168.54.1
#count=`ps | grep dnsmasq | grep -v grep | wc -l`
#if [ ${count} -lt 1 ] ;then
#  echo "/etc/init.d/S80dnsmasq start" >> /tmp/rndis.log 2>&1
#  /etc/init.d/S80dnsmasq start >> /tmp/rndis.log 2>&1
#fi
重启后就可以正常从 网线登陆和从网络安装其他软件了
pacman -Syy
pacman -S vim htop wget curl tmux fish ca-certificates
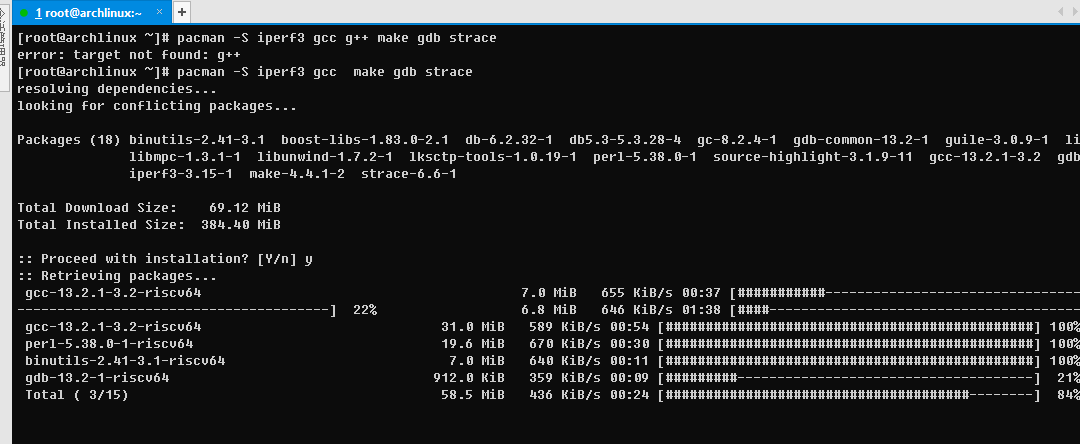
pacman -S iperf3 gcc make gdb strace
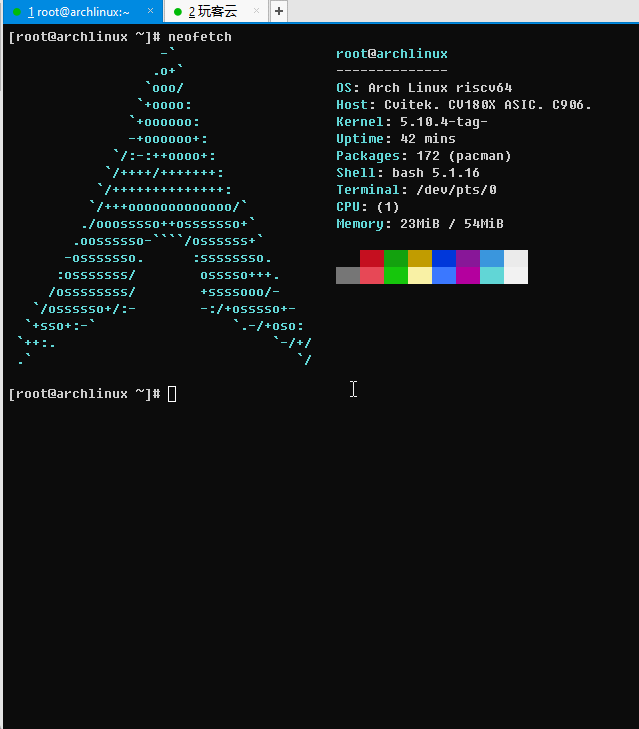
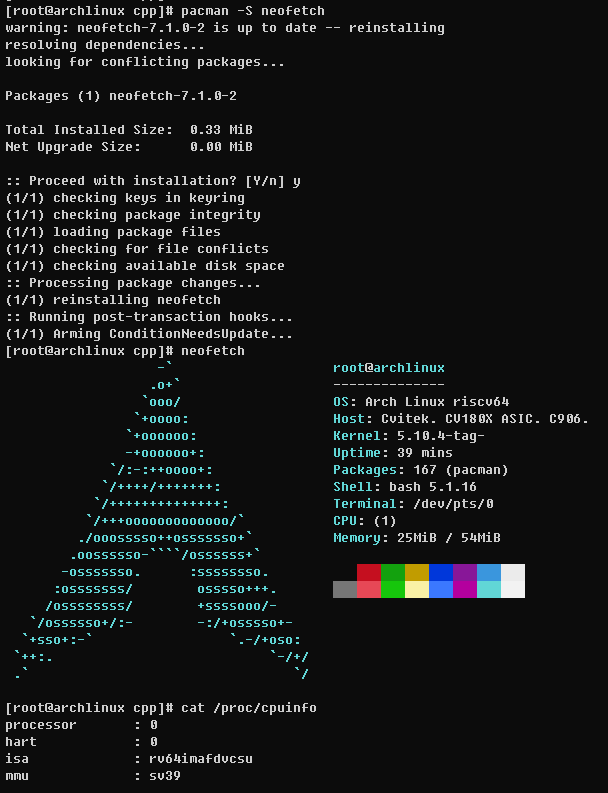
安装测试图片

gcc 版本
[root@archlinux ~]# gcc -v
Using built-in specs.
COLLECT_GCC=gcc
COLLECT_LTO_WRAPPER=/usr/lib/gcc/riscv64-unknown-linux-gnu/13.2.1/lto-wrapper
Target: riscv64-unknown-linux-gnu
Configured with: /build/gcc/src/gcc/configure --enable-languages=c,c++,d,fortran,go,lto,objc,obj-c++ --enable-bootstrap --prefix=/usr --libdir=/usr/lib --libexecdir=/usr/lib --mandir=/usr/share/man --infodir=/usr/share/info --with-bugurl=https://bugs.archlinux.org/ --with-build-config=bootstrap-lto --with-linker-hash-style=gnu --with-system-zlib --enable-__cxa_atexit --enable-cet=auto --enable-checking=release --enable-clocale=gnu --enable-default-pie --enable-default-ssp --enable-gnu-indirect-function --enable-gnu-unique-object --enable-libstdcxx-backtrace --enable-link-serialization=1 --enable-linker-build-id --enable-lto --enable-plugin --enable-shared --enable-threads=posix --disable-libssp --disable-libstdcxx-pch --disable-multilib --disable-werror
Thread model: posix
Supported LTO compression algorithms: zlib zstd
gcc version 13.2.1 20230801 (GCC)
iperf3 网速测试
iperf3 -s
-----------------------------------------------------------
Server listening on 5201 (test #1)
-----------------------------------------------------------
Accepted connection from 192.168.1.122, port 39606
[  5] local 192.168.1.193 port 5201 connected to 192.168.1.122 port 39612
[ ID] Interval           Transfer     Bitrate
[  5]   0.00-1.02   sec  11.4 MBytes  93.9 Mbits/sec
[  5]   1.02-2.02   sec  11.2 MBytes  94.1 Mbits/sec
[  5]   2.02-3.02   sec  11.2 MBytes  94.1 Mbits/sec
[  5]   3.02-4.01   sec  11.1 MBytes  94.1 Mbits/sec
[  5]   4.01-5.02   sec  11.2 MBytes  94.1 Mbits/sec
[  5]   5.02-6.02   sec  11.2 MBytes  94.1 Mbits/sec
[  5]   6.02-7.02   sec  11.2 MBytes  94.1 Mbits/sec
[  5]   7.02-8.01   sec  11.1 MBytes  94.1 Mbits/sec
[  5]   8.01-9.01   sec  11.2 MBytes  94.2 Mbits/sec
[  5]   9.01-10.02  sec  11.2 MBytes  94.0 Mbits/sec
- - - - - - - - - - - - - - - - - - - - - - - - -
[ ID] Interval           Transfer     Bitrate
[  5]   0.00-10.02  sec   112 MBytes  94.1 Mbits/sec                  receiver
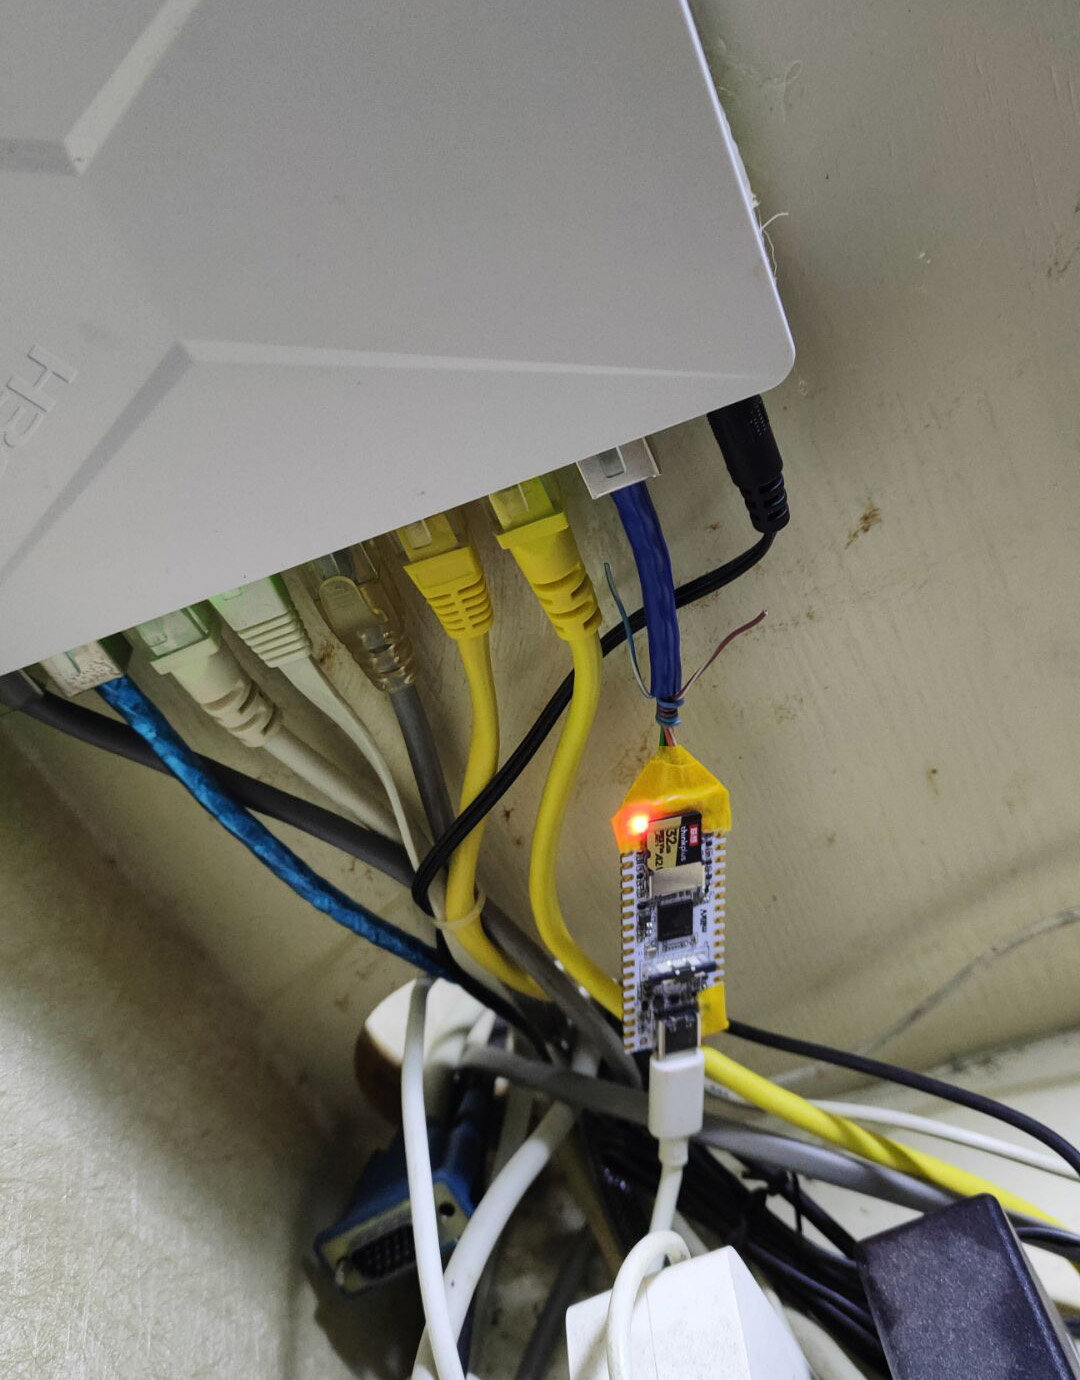
The network cable cannot be too long. My method is no more than 10cm. The four network cables are flush and directly wound around the copper-clad board.
The other end is powered by USB, connected to a USB ()similar to the ARM Raspberry Pi box, saving a 5V power supply
(网线不能太长,我的方法没有超过10cm,4根网线平齐,直接绕在覆铜板上。
另一端 USB 供电,接在类似ARM树莓派盒子的USB上,节省一个5V电源器)