Referencing the datasheet, we can see the RTC subsystems and the 8051 get many dedicated peripherals, including a section of SRAM for storing 8051 code and whatever else we want to keep during
sleep, but how do we access them?
All the peripherals, cores, and oher things, are connected to the AHB bus (from ARM), which can be thought as glueing everything within the address space of the SoC and letting them communicate and
set things via writes and reads.
We need to write to the SoC address space from userspace from the linux OS to setup the 8051 (and any other peripheral or device we want to access that isnt contained within the same architectural
block i/e riscv CSR registers stuffs dont go through the bus for example), there are multiple methods:
- Writing a kernel module and/or driver, which runs with privilege in kernelspace
- Using the /dev/mem interface, which is a file representation usable in userspace of the SoC’s address space
- Telling the second core to do it for us because it doesnt care much about such memory safety concerns (arduino can do that)
We are going to use the second method: the milkv duo system image uses busybox by default, which comes with a utility callable via busybox devmem, which uses /dev/mem to let us set and get
the values we want.
As an example, you may switch the LED on or OFF (disable default blinky first):
The led pin is GPIO25
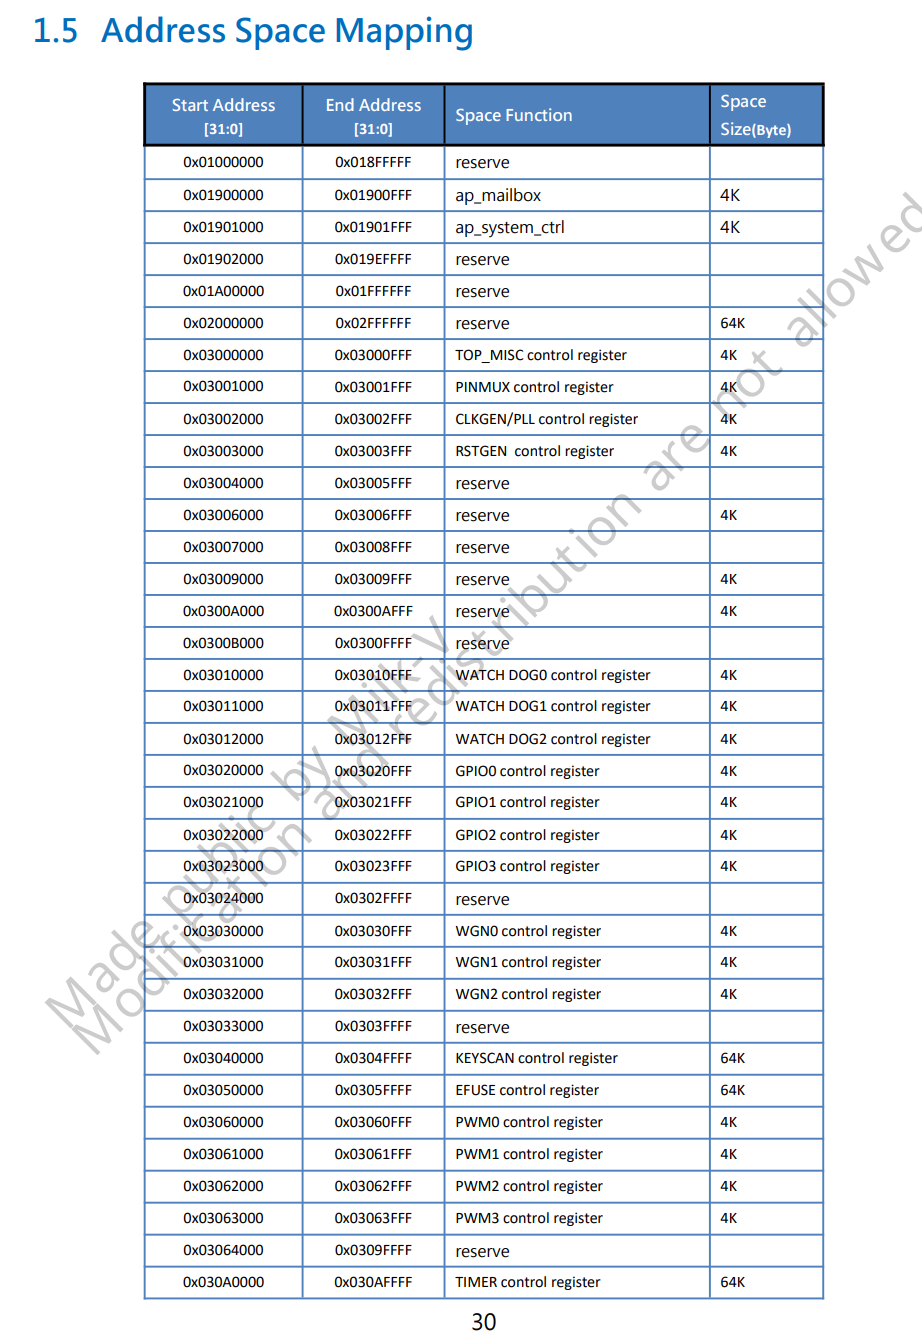
First we identify a GPIO controller peripheral, there are 5 controllers, each controlling a group of pins identified by (in order, from here )XGPIO*:
XGPIOA: 0x03020000
XGPIOB: 0x03021000
XGPIOC: 0x03022000
XGPIOD: 0x03023000
POWERGPIO: 0x05021000 (RTC domain)
if we look at the excel sheet, we can see GPIO25 (LED, PAD_AUD_AOUTR), is on XGPIOC, so we use peripheral 0x03022000.
Then we identify the pinmux peripheral, which lets us set pin25 to be GPIO: 0x03001000
Pinmux functionality is not documented in the datasheet, but the code in GitHub - milkv-duo/milkv-duo-pinmux: Milk-V Duo pin multiplexing tool. This repo is maintained for the buildroot package. can help us:
pin offset in pinmux is : 0x12c
0x03001000 + 0x12c = 0x0300112c
We can read the current status of the pin:
busybox devmem 0x0300112c 32
This Returns 0x3 on my Duo, which means it is already in GPIO mode, so no further action is required, if it isnt in GPIO mode, you can set it (though there is no predicting what will happen if
something else is using it):
busybox devmem 0x0300112c 32 0x3
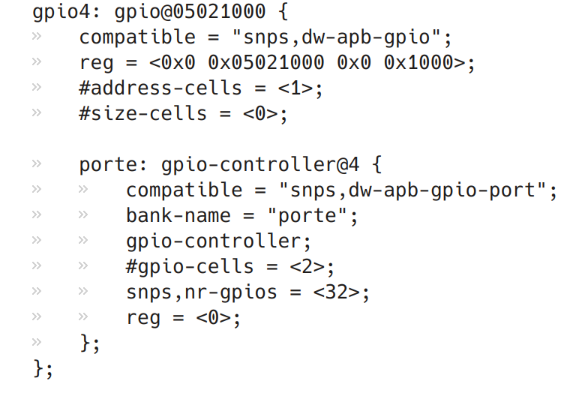
Then we take a look at the datasheet and maybe… the linux driver for Synopsys DesignWare GPIO controllers (which is what the duo uses), which is shortened to snps and have a matching linux
driver file gpio-dwapb.c.
Each gpio pin in 1 bit in multiple sections, related to the 32 gpio limit, the section sizes here are 32-bits.
#read initial DDR (direction = input or output, 0 or 1) to try and not break anything if some values were previously set

busybox devmem 0x03022004 32
It should be all 0s, if it isnt, use OR operations and bitshifting to calculate what you should set it to (EG bitshift 1 left 24 times, OR that to the value we just got)
A note on the bits to set: They tend to match the pin number, but dont always do! check the spreadsheet to be sure you are switching the right bits!
#set direction to output

busybox devmem 0x03022004 32 0x1000000
Finally, we set the output value using the same style of operation, but on the ‘data’ register
busybox devmem 0x03022000 32 0x1000000
So this is how to access peripherals on the bus, the next step (or maybe the one after) will involve compiling and uploading a simple program that toggles the LED to the 8051! Can you read the datasheet and find out which address we will write the program at?
Answer
0x05200000