【Arch Linux On Milkv-duo】Milkv-duo 运行 Arch Linux 系统

先上图:

Pasted image 20230723210101

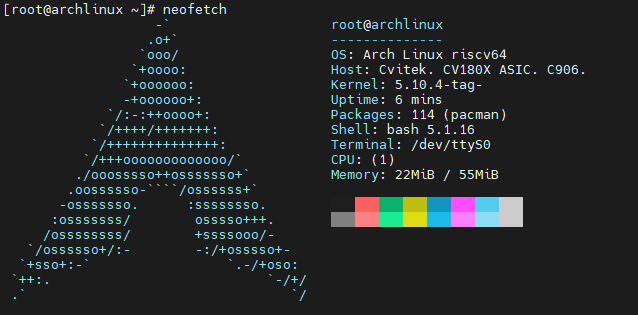
通过更换 rootfs,可以实现 milkv-duo 上运行 arch linux riscv 系统。

以下相关编译工作在 Ubuntu 中完成,串口连接使用 Windows 下的 MobaXterm。

1. 编译

修改kernel配置

首先配置修改 kernel config 添加相关所需要的功能(主要是为了满足 systemd 的各种依赖):

路径:build/boards/cv180x/cv1800b_milkv_duo_sd/linux/cvitek_cv1800b_milkv_duo_sd_defconfig

diff --git a/build/boards/cv180x/cv1800b_milkv_duo_sd/linux/cvitek_cv1800b_milkv_duo_sd_defconfig b/build/boards/cv180x/cv1800b_milkv_duo_sd/linux/cvitek_cv1800b_milkv_duo_sd_defconfig
index 6c05a05df..d214f4fe0 100644
--- a/build/boards/cv180x/cv1800b_milkv_duo_sd/linux/cvitek_cv1800b_milkv_duo_sd_defconfig
+++ b/build/boards/cv180x/cv1800b_milkv_duo_sd/linux/cvitek_cv1800b_milkv_duo_sd_defconfig
@@ -260,3 +260,23 @@ CONFIG_ADVISE_SYSCALLS=n
 CONFIG_SIGNALFD=n
 CONFIG_TIMERFD=n
 CONFIG_EPOLL=n
+
+# for arch linux
+CONFIG_CGROUPS=y
+CONFIG_CGROUP_FREEZER=y
+CONFIG_CGROUP_PIDS=y
+CONFIG_CGROUP_DEVICE=y
+CONFIG_CPUSETS=y
+CONFIG_PROC_PID_CPUSET=y
+CONFIG_CGROUP_CPUACCT=y
+CONFIG_PAGE_COUNTER=y
+CONFIG_MEMCG=y
+CONFIG_CGROUP_SCHED=y
+CONFIG_NAMESPACES=y
+CONFIG_OVERLAY_FS=y
+CONFIG_AUTOFS4_FS=y
+CONFIG_SIGNALFD=y
+CONFIG_TIMERFD=y
+CONFIG_EPOLL=y
+CONFIG_IPV6=y
+CONFIG_FANOTIFY

其他配置修改

增大内存以及 rootfs分区的大小(待会使用的 Arch Linux 的根文件系统较大,默认大小可能容纳不下):

diff --git a/build/boards/cv180x/cv1800b_milkv_duo_sd/memmap.py b/build/boards/cv180x/cv1800b_milkv_duo_sd/memmap.py
index 84161267a..99d640134 100644
--- a/build/boards/cv180x/cv1800b_milkv_duo_sd/memmap.py
+++ b/build/boards/cv180x/cv1800b_milkv_duo_sd/memmap.py
@@ -40,7 +40,7 @@ class MemoryMap:
     # =================
     # Multimedia buffer. Used by u-boot/kernel/FreeRTOS
     # =================
-    ION_SIZE = 26.80078125 * SIZE_1M
+    ION_SIZE = 0 * SIZE_1M
     H26X_BITSTREAM_SIZE = 0 * SIZE_1M
     H26X_ENC_BUFF_SIZE = 0
     ISP_MEM_BASE_SIZE = 0 * SIZE_1M
diff --git a/milkv/genimage-milkv-duo.cfg b/milkv/genimage-milkv-duo.cfg
index 40a95c7fb..ef89f3d79 100644
--- a/milkv/genimage-milkv-duo.cfg
+++ b/milkv/genimage-milkv-duo.cfg
@@ -13,7 +13,7 @@ image rootfs.ext4 {
 	ext4 {
 		label = "rootfs"
 	}
-	size = 256M
+	size = 1G
 }
 
 image milkv-duo.img {

开始编译

直接使用官方命令编译:

cd duo-buildroot-sdk/
./build_milkv.sh

export MILKV_BOARD=milkv-duo
source milkv/boardconfig-milkv-duo.sh

source build/milkvsetup.sh
defconfig cv1800b_milkv_duo_sd
clean_all
build_all
pack_sd_image

2. 修改根文件系统

导入 Arch Linux 根文件系统

先从 Arch Linux RISC-V项目 下载根文件系统:

cd 某个地方
wget https://archriscv.felixc.at/images/archriscv-2023-07-10.tar.zst

然后挂载之前编译出来的 img 镜像进行修改:

  1. 寻找 loop 设备:
sudo losetup -f

我这边输出的是/dev/loop18,后续需要将这个数字根据实际情况修改

  1. img 镜像与 loop 设备绑定:
sudo losetup -P loop18 /path/to/duo-buildroot-sdk/install/soc_cv1800b_milkv_duo_sd/milkv-duo.img
  1. 挂载 rootfs 分区
sudo mkdir /mnt/duo-rootfs
cd /mnt/duo-rootfs

删除原本的内容

sudo rm -rf ./*

arch linux 的根文件系统解压到此

tar -xvf /path/to/archriscv-2023-07-10.tar.zst -C .

下载需要的包

可以从 https://mirror.iscas.ac.cn/archriscv/repo 来下载需要的包

由于更换根文件系统之后官方的 kosh 脚本等文件都没有了(可以从之前的根文件系统中拷过来,但是可能会缺少依赖,需要大家后续来解决),板上可能没有网络,且还无法使用rndis,这边建议先安装 rzsz 命令来用于串口传输文件

cd /mnt/duo-rootfs/root
wget https://mirror.iscas.ac.cn/archriscv/repo/extra/lrzsz-0.12.20-8-riscv64.pkg.tar.zst

当然,解决了开发板网络问题的朋友们可以直接使用 pacman 来安装应用

烧入 tf 卡

当下载拷贝工作都完成之后,可以先取消挂载 img 镜像:

sudo umount /dev/loop18p2
sudo losetup -d /dev/loop18

然后就可以将 img 镜像烧入 tf 卡中了

3. 插电 开机

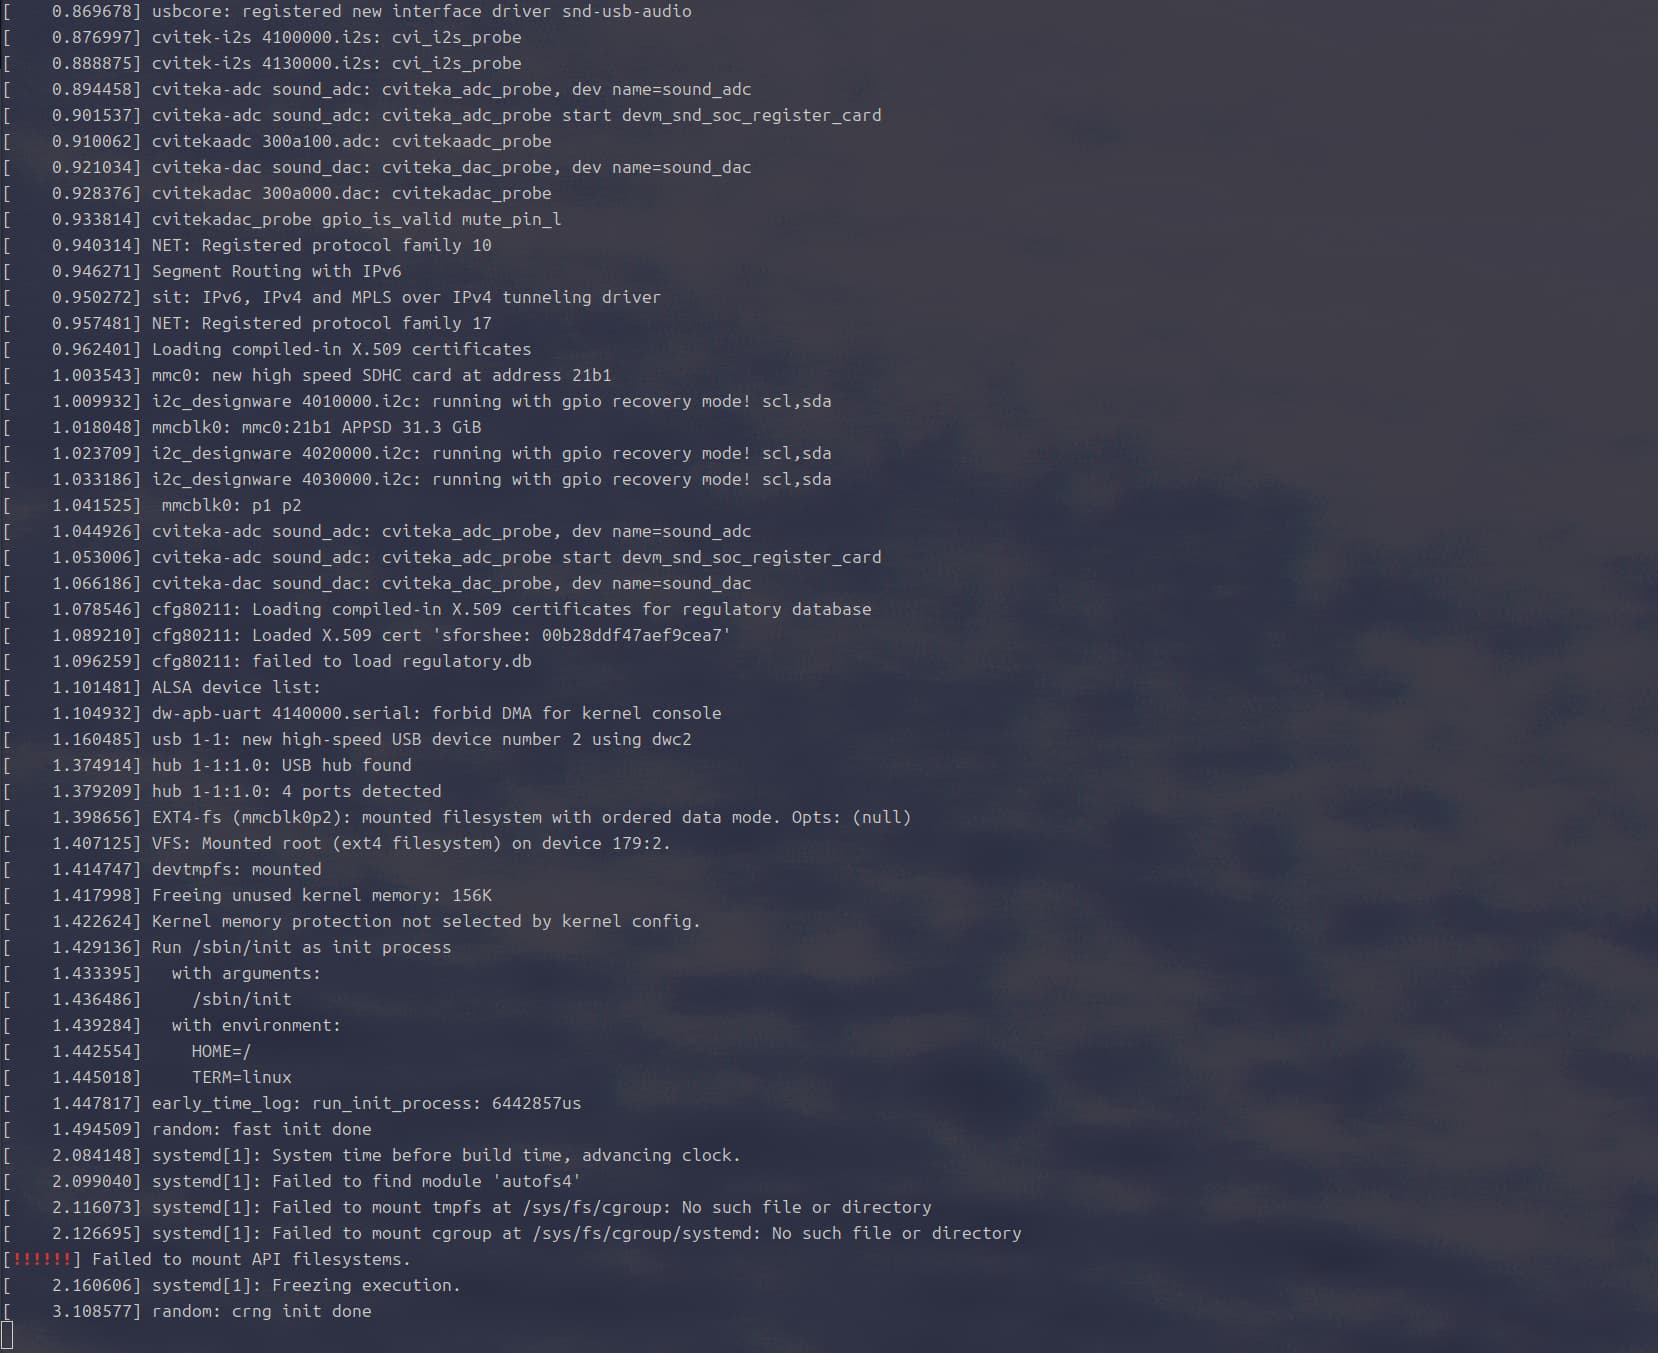
开机并通过串口连接到开发板,如一切顺利,大概 40s 之后就可以看到登录界面了
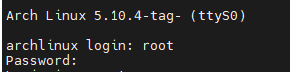
Pasted image 20230723220757

默认账号:root
默认密码:archriscv

登录成功后 ls 一下,就能看到之前下载的 lrzsz 包了,先将其安装:

pacman -U ./lrzsz-0.12.20-8-riscv64.pkg.tar.zst

安装成功后,就可以使用 rz 命令传输文件了:

  1. 输入 rz ,shell 中会提示 waiting to receive
  2. 在 mobaxterm 中按 ctrl + 鼠标右键,选择 Send file using Z-moderm,然后选择想要上传的文件,这边选择了提前下载好的 neofetch-7.1.0-2-any.pkg.tar.zst
  3. 等待传输完毕

注意:本人在使用 rz 命令传输大文件的时候发生了开发板卡死的现象,大家尽量避免传输大文件

使用 pacman 安装 neofetch ,运行,就能看到文章开头图片的界面啦

Pasted image 20230723210101

本人水平有限,欢迎各位指出问题 :handshake:,大家一起来折腾 :sunglasses:

10 Likes

兄弟,你这个厉害呀!前几天我还打算试着移植Debian系统来着,但是担心运行不起来,你这个着实666

不过,现在Debian肯定是没指望,压根不支持RISCV,不过据说13会支持,真羡慕ARCH啊

哈哈其实都是别人移植好的,我只是把别人做好的根文件系统搬过来了

debian好像是前几天发了说debian13会支持riscv,估计要等个几年 :joy:。现在想玩deb系的话应该ubuntu比较方便吧,ubuntu好像官方支持riscv了,应该移植过来也比较容易

那也是真的牛,厉害!前几天有空的时候又研究了一下,Debian现在也有了,不过Ubuntu的好像更加轻松一些。

I tried to follow your guide (using google translate) and downloaded updated archriscv-2023-10-09, and it worked and booted and logged in via serial - thanks!

As I asked about a repo with precompiled packages before, this approach with ArchLinux might work. :slight_smile:

So, I’m currently downloading the entire repo and put it on the SD card /mnt/data, so I can install them right away, and try to get rndis network and sshd working - keep you updated.

2 Likes

I was able to get the network running, copy from BuildRoot SDK on the SD card (same location rootfs/etc/):

  • /etc/uhubon.sh

  • /etc/usb-host.sh

  • /etc/run_usb.sh

  • /etc/dhcpcd.conf

  • /etc/dnsmasq.conf

  • /etc/usb-rndis.sh (replace & chmod +x):

!/bin/sh

/etc/uhubon.sh device >> /tmp/rndis.log 2>&1
/etc/run_usb.sh probe rndis >> /tmp/rndis.log 2>&1
/etc/run_usb.sh start rndis >> /tmp/rndis.log 2>&1

sleep 0.5
ip link set dev usb0 up
ip a add 192.168.42.1/24 dev usb0
sleep 0.5
systemctl start dnsmasq

Install following packages (*.zst) from the repo (see in core/ and extra/) unto the SD card (e.g. into /root/) as well:

  • jansson
  • nftables
  • dnsmasq
  • dhcpcd
  • pacman
  • dnssec-anchors
  • ldns
  • libedit
  • openssh

Install pacman: you need to install forcefully first, while you have the SD card mounted:

% cd /dev/loop36p2
% tar xfv /path/pacman*.zst -C .

or

% cd /media/<user>/rootfs
% tar xfv /path/pacman*.zst -C .

then do sync on the host, remove SD card and put it into the board, and boot, attach serial cable and connect e.g. tio /dev/ttyUSB0 under Linux, login as ‘root’, passwd ‘archriscv’

Then install all the packages as listed above in the same order, given they reside in /root/:

  • pacman -U ./jansson*.zst
  • pacman -U ./nftables*.zst
  • etc

Then run /etc/usb-rndis.sh and you should be able to get an IP, the board has 192.168.42.1, check with ip a

In order to use ssh:

  • edit /etc/ssh/sshd_config and add following line: PermitRootLogin yes
  • systemctl start sshd
  • or use dropbear package (lightweight ssh), which has root login on by default.

I have to think a bit how to make this solution more easy available, as tar.gz or as disk image where all those steps are done.

Open Issues:

  • making /etc/usb-rndis.sh a service to be used by systemctl
  • /run/ (tmpfs) is too small with 11M, systemctl enable sshd complains with Failed to reload daemon: Refusing to reload, not enough space available on /run/systemd/. Currently, 10.5M are free, but a safety buffer of 16.0M is enforced.

It’s the first time I use ArchLinux (I come from Debian/Ubuntu) perhaps there is a more elegant way to install the packages and its dependencies before network is available.

1 Like

Followup of remaining issues:

larger /run space

/etc/fstab, add this line:

tmpfs /run tmpsfs rw,nosuid,nodev,relatime,size=30M 0 0

then mount -o remount,size=30M /run

rndis systemctl service

create new file /usr/lib/systemd/system/rndis.service:

[Unit]
Description=RNDIS

[Service]
User=root
WorkingDirectory=/etc/
ExecStart=/etc/usb-rndis.sh
# optional items below
#Restart=always
#RestartSec=3

[Install]
WantedBy=multi-user.target

then systemctl enable rndis and reboot.

In case you use Ethernet, you systemctl disable rndis.

1 Like

Thanks for your reading and comments. I just connected to the board with serial and used IO board to connect to the Internet. With your sharing we can also use rndis in Archlinux now. Cool! :sunglasses:

1 Like

Disk Image Download

For those who want to download a disk image: IoT: Milk-V Duo (RISC-V) eSBC running Linux | XYZ dims *

  • min 4GB SD card recommended
  • 2GB rootfs (1GB free)
  • 55MB RAM
  • 256MB swap space

Note: pacman -Fy 'term' fails for me (too much memory needed), instead run gzip -d -c /var/lib/pacman/sync/*.files | grep -ai 'term'

3 Likes

Llama2.c on MilkV Duo :wink:

After seeing Milk-V Duo achieves baby Llama 2 at 0.5 tok/s. - CV1800B(Duo English Forum) - Sophgo I tried it out, all running on the board (no cross-compiling):

pacman -Sy git tcc wget
git clone https://github.com/karpathy/llama2.c
cd llama2.c
tcc -o run run.c -lm
wget https://huggingface.co/karpathy/tinyllamas/resolve/main/stories15M.bin
./run stories15M.bin
Once upon a time, there was a little girl named Lily. She loved to play with her toys and eat yummy snacks. One day, Lily's mommy said, "Let's clean up your toys before we eat the snacks!" Lily thought it was a good idea, so they started cleaning up.
After they finished cleaning, Lily's mommy put the snacks in the freezer. Lily was so excited to eat them and check the freezer to see if they were fresh. But when they opened the freezer, they saw that the snacks had turned out thin and tasted funny. Lily's mommy felt bad that they didn't have enough to eat.
Lily had an idea. She said, "Let's put some new snacks in the freezer and try again!" So they did. And sure enough, they had gained some new snacks from the freezer. Lily and her mommy were happy and enjoyed their snacks together. The end.
achieved tok/s: 0.192897
2 Likes

I developed a solution for random but persistent MAC addresses with RNDIS: https://xyzdims.com/3d-printers/misc-hardware-notes/iot-milk-v-duo-risc-v-esbc-running-linux/#Static_IP_for_Host_with_RNDIS which makes it easier to control the host IP in RNDIS setup:

/etc/usb-rndis.sh add new line calling /etc/rndis-macs.sh:

#!/bin/sh

/etc/uhubon.sh device >> /tmp/rndis.log 2>&1
/etc/run_usb.sh probe rndis >> /tmp/rndis.log 2>&1
/etc/rndis-macs.sh >> /tmp/rndis.log 2>&1
/etc/run_usb.sh start rndis >> /tmp/rndis.log 2>&1
....

/etc/rndis-macs.sh:

#!/bin/bash

RNDIS_USB="/tmp/usb/usb_gadget/cvitek/functions/rndis.usb0"
MAC_FILE="/etc/rndis-macs.conf"

generate_random_mac() {
    printf "02:%02x:%02x:%02x:%02x:%02x\n" $((RANDOM%256)) $((RANDOM%256)) $((RANDOM%256)) $((RANDOM%256)) $((RANDOM%256))
}

# check if the MAC address file exists and has exactly two lines
if [[ -f "$MAC_FILE" ]] && [[ $(wc -l < "$MAC_FILE") -eq 2 ]]; then
    # read the two MAC addresses from the file
    IFS=$'\n' read -d '' -r -a macs < "$MAC_FILE"
    dev="${macs[0]}"
    host="${macs[1]}"
    echo "using existing MAC addresses:"
else
    # generate two new MAC addresses and store them in the file
    echo "generating new MAC addresses:"
    dev=$(generate_random_mac)
    host=$(generate_random_mac)
    echo "$dev" > "$MAC_FILE"
    echo "$host" >> "$MAC_FILE"
fi
echo "dev_addr: $dev"
echo "host_addr: $host"
echo "$dev" > "$RNDIS_USB"/dev_addr
echo "$host" > "$RNDIS_USB"/host_addr

I put the solution as mentioned above into the new image (v0.0.3):

  • 8GB SD card minimum
  • random but persistent MAC addresses for RNDIS
    • static board IP 192.168.42.1 (as before)
    • static host IP 192.168.42.2 (new)
    • internet routing ready *)

*) enable NAT on your host, then your board(s) are able to reach the internet via RNDIS.

3 Likes

Thanks for all the work you’ve put into this so far. All of this is way over my head so I wouldn’t even know where to start! I’ve got you latest image running but I can’t figure out the internet connection part. I have a NAT on my windows machine but I don’t understand how to pass that through the RNDIS. I also have the IO board but I don’t see anything pop up on my network when I mount the duo and plug it in (I can if I use the default buildroot image) If you could point me to whichever solution is easier that would be very appreciated!

Hi parallacks, I did not use RNDIS to connect to the network, and instead using the IO board. If you want to use the IO board to connect to the network via a physical cable, you can do this in the Duo’s shell:

change 192.168.50.1 to your gateway address

echo -e "[Match]\nName=end0\n\n[Network]\nDHCP=yes\n\n[Route]\nGateway=192.168.50.1" | tee /etc/systemd/network/20-wired.network

systemctl enable systemd-networkd
systemctl restart systemd-networkd.service

And I think you can connect to the network now.

添加网卡mac和固定IP地址

  • cat /etc/usb-rndis.sh
#!/bin/sh

/etc/uhubon.sh device >> /tmp/rndis.log 2>&1
/etc/run_usb.sh probe rndis >> /tmp/rndis.log 2>&1
/etc/rndis-macs.sh >> /tmp/rndis.log 2>&1
/etc/run_usb.sh start rndis >> /tmp/rndis.log 2>&1

sleep 0.5
ip link set dev usb0 up
ip a add 192.168.42.1/24 dev usb0
sleep 0.5
systemctl start dnsmasq
sleep 0.5

ip link set dev end0 down
ip link set dev end0 address 78:01:B3:FC:E8:55
sleep 0.5

ip link set dev end0 up

sleep 0.5
ip a add 192.168.1.193/24 dev end0
sleep 0.5
ip r add default via 192.168.1.1
sleep 0.5

2 Likes

Is it possible to use a USB WiFi adapter with this?

I’m afraid you have to compile the usb wifi adapter driver by yourself. Like: https://community.milkv.io/t/milkv-duo-rtl8723du-usb-wifi/928

1 Like